Are you ready to enhance your Tesla ownership experience by learning how to install Tesla Wall Charger at home? In this comprehensive guide, we’ll walk you through the step-by-step process of installing a Tesla Wall Charger, ensuring that you can enjoy fast and convenient charging right in your own garage.
Whether you’re a DIY enthusiast or considering hiring an electrician for the job, we’ve got you covered. Let’s dive into the world of Tesla Wall Charger installation and get your electric vehicle powered up efficiently and safely.
Benefits of Installing a Tesla Wall Charger
1. Fast Charging for Your Tesla
One of the most compelling reasons to invest in a Tesla Wall Charger is the remarkable speed at which it can charge your electric vehicle. Unlike standard household outlets, Tesla Wall Chargers are designed to deliver a higher voltage, enabling much faster charging times.
With a Tesla Wall Charger, you can significantly reduce the time it takes to top up your vehicle’s battery, making it incredibly convenient for daily commutes and road trips.
2. Convenient Home Charging
Imagine the convenience of waking up each morning to a fully charged Tesla. With a Tesla Wall Charger installed in your home, this dream becomes a reality.
You no longer need to visit public charging stations or worry about finding a vacant spot at a crowded station. Your Tesla will always be ready to go, right in your own driveway. This level of convenience is a game-changer, especially for those with busy lifestyles.
3. Substantial Cost Savings
Investing in a Tesla Wall Charger can lead to significant cost savings over time. Here’s how:
- Lower Electricity Costs: Tesla Wall Chargers are highly efficient, meaning they draw power more effectively, resulting in reduced electricity bills compared to public charging stations.
- Reduced Wear and Tear: Frequent use of public charging stations can put extra wear and tear on your Tesla’s charging cable and connectors. With home charging, these components last longer, saving you on potential maintenance costs.
- Eliminate Charging Fees: Many public charging stations come with usage fees, which can add up over time. By charging at home with your Tesla Wall Charger, you can avoid these additional expenses.
In conclusion, installing a Tesla Wall Charger offers Tesla owners a trifecta of benefits: lightning-fast charging, unparalleled convenience, and substantial cost savings.
With these advantages at your disposal, you can maximize the joy of driving your Tesla while minimizing the inconveniences associated with traditional charging methods. Make the smart choice and upgrade your EV experience with a Tesla Wall Charger today.
DIY vs. Professional Installation
DIY Installation: Pros and Cons
| Pros: | Cons: |
|---|---|
| Cost Savings: One of the most attractive aspects of DIY projects is the potential for cost savings. You can avoid labor fees, and you have control over the cost of materials. | Skill Level: Not all projects are suitable for DIY, and if you lack the necessary skills, you may end up with subpar results or even damage your property. |
| Flexibility: DIY allows you to work on your project at your own pace, fitting it into your schedule as needed. | Time-Consuming: DIY projects often take longer to complete, especially if you’re learning as you go. |
| Learning Opportunity: DIY projects can be a great way to learn new skills and gain a sense of accomplishment. | Safety Risks: Some projects, like electrical or plumbing work, can pose safety risks if not done correctly. |
Professional Installation: Pros and Cons
| Pros: | Cons: |
|---|---|
| Expertise: Professionals bring experience and expertise to the table, ensuring the project is done correctly and efficiently. | Expertise: Professionals bring experience and expertise to the table, ensuring the project is done correctly and efficiently. |
| Time-Efficient: Professionals can complete projects more quickly, minimizing disruption to their daily lives. | Time-Efficient: Professionals can complete projects more quickly, minimizing disruption to their daily life. |
| Warranty: Many professional installations come with warranties, providing peace of mind in case issues arise. | Warranty: Many professional installations come with warranties, providing peace of mind in case issues arise. |
Making the Decision
When deciding between DIY and professional installation, consider the following factors:
- Complexity of the Project: Evaluate the complexity and skill level required for your project. For simple tasks, DIY may suffice, but complex projects often benefit from professional expertise.
- Budget: Assess your budget and weigh the cost savings of DIY against the potential risks and expenses of fixing mistakes.
- Time Constraints: Consider your availability and the time constraints of your project. DIY projects may take longer, which could impact your daily life.
- Safety: Safety should be a top priority. If a project involves electrical, plumbing, or structural work, it’s usually safer to hire a professional.
- Quality Expectations: Think about the quality and outcome you desire. Professionals are more likely to deliver a polished and reliable result.
In conclusion, the decision between DIY and professional installation depends on your project’s specifics and your own skills and preferences.
For small, manageable tasks, DIY can be a cost-effective choice. However, for complex or safety-critical projects, investing in professional installation can save you time, stress, and potentially costly mistakes. Weigh your options carefully to ensure your home project meets your expectations and requirements.
Tools and Materials Needed
When tackling DIY projects, having the right tools and materials on hand is essential to ensure a successful and efficient outcome.
1. Hand Tools:
a. Screwdrivers: Invest in a variety of screwdrivers, including flathead and Phillips-head, in different sizes to handle various tasks.
b. Hammer: A reliable hammer is indispensable for tasks like driving nails, removing old fixtures, and more.
c. Pliers: Needle-nose pliers, slip-joint pliers, and locking pliers are versatile tools for gripping, bending, and cutting.
d. Wrenches: Adjustable wrenches and socket sets are crucial for tightening or loosening nuts and bolts.
e. Tape Measure: Accurate measurements are essential; choose a quality tape measure for precision.
f. Utility Knife: A sharp utility knife is handy for cutting materials like drywall, insulation, or packaging.
2. Power Tools:
a. Cordless Drill: A cordless drill is a versatile tool for drilling holes and driving screws.
b. Circular Saw: Ideal for cutting lumber and plywood with precision.
c. Jigsaw: Great for making curved cuts in various materials, including wood and plastic.
d. Reciprocating Saw: Perfect for demolition work and cutting through metal and wood.
e. Router: Essential for woodworking projects, creating decorative edges, and hollowing out areas.
3. Safety Gear:
a. Safety Glasses: Protect your eyes from flying debris and dust.
b. Hearing Protection: Earplugs or earmuffs are crucial when working with loud power tools.
c. Dust Mask: Keep your respiratory system safe from airborne particles and dust.
d. Work Gloves: Protect your hands from sharp edges, chemicals, and splinters.
e. Safety Helmet: Necessary for tasks where head protection is required.
4. Building Materials:
a. Lumber: Depending on your project, you may need various types and sizes of lumber.
b. Fasteners: Nails, screws, bolts, and anchors are essential for securing materials.
c. Paint and Finish: Choose the appropriate paint, stain, or finish for your project.
d. Adhesives: Glues, epoxy, and caulking for bonding and sealing.
e. Electrical and Plumbing Supplies: For projects involving wiring or plumbing, you’ll need the appropriate materials.
5. Miscellaneous:
a. Level: Ensure your work is straight and plumb with a quality level.
b. Stud Finder: Helpful for locating wall studs when hanging heavy objects.
c. Extension Cords: Extend your power tool’s reach with sturdy extension cords.
d. Toolbox: Keep your tools organized and easily accessible.
e. Ladder: A safe, stable ladder is crucial for tasks at different heights.
By having these essential tools and materials at your disposal, you’ll be well-equipped to tackle a wide range of DIY projects. Remember, investing in quality tools and practicing safety precautions will not only make your projects more efficient but also ensure your safety throughout the process. Start your DIY journey with confidence and achieve outstanding results.
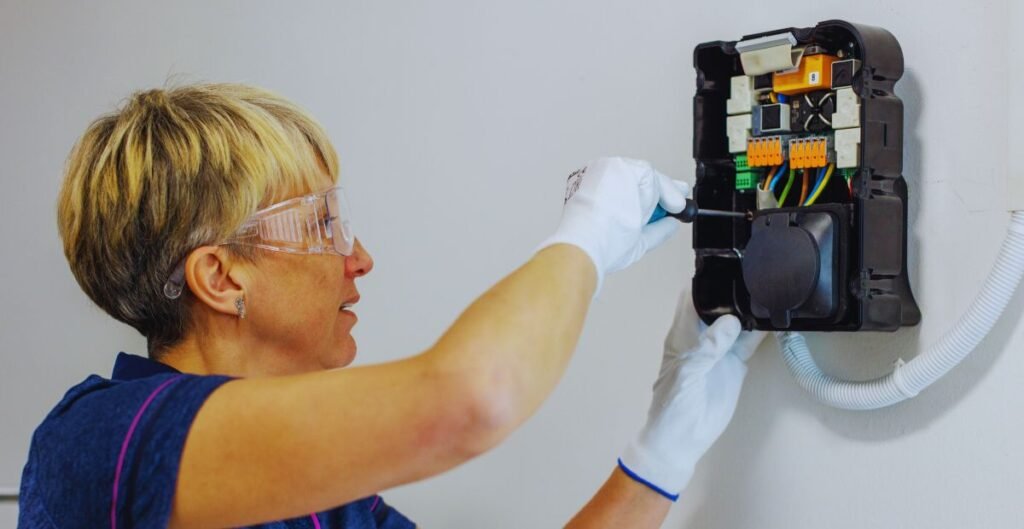
Step-by-Step Guide
Step 1: Preparation for Your EV Charger Installation
Before diving into your electric vehicle (EV) charger installation, thorough preparation is key. Gather the necessary tools, materials, and knowledge needed to complete the installation smoothly.
Step 2: Choosing the Ideal Location for Your Charger
Selecting the right location is crucial for efficient and convenient charging. Learn how to evaluate and choose the optimal spot for your EV charger that ensures easy access while adhering to safety guidelines.
Step 3: Mounting Your EV Charger
Discover the step-by-step process of securely mounting your EV charger at the chosen location. Proper mounting ensures stability and safety for your charging station.
Step 4: Wiring Your EV Charger
Understanding the electrical wiring process is essential to ensure a safe and reliable charging setup. Learn how to correctly connect your charger to the power source while adhering to local electrical codes.
Step 5: Testing Your EV Charger
Before fully completing the installation, it’s crucial to test your EV charger to confirm that it’s functioning as expected. Learn how to perform the necessary tests and checks to guarantee proper operation.
Step 6: Commissioning Your EV Charger
Once the installation and testing are complete, commissioning your charger is the final step. This involves configuring the charger’s settings and ensuring it’s ready for use.
Our guide provides a detailed walkthrough to help you get your EV charger up and running smoothly.
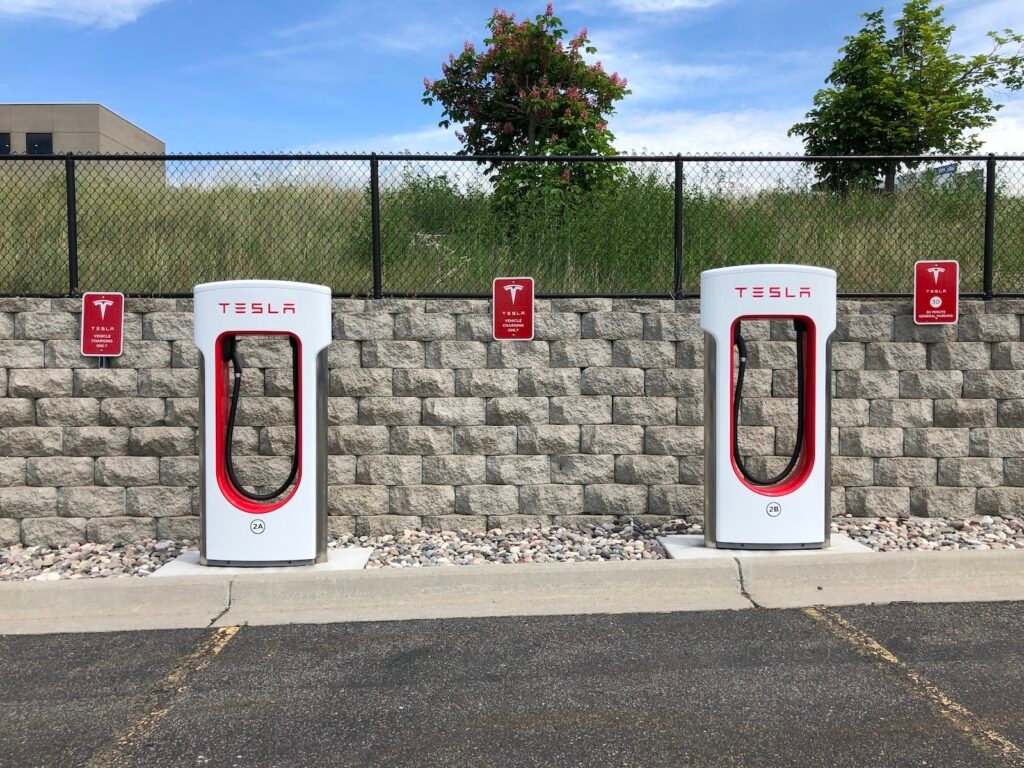
Tesla Wall Charger Versions
Tesla offers a range of Wall Charger versions to cater to various electric vehicle (EV) charging requirements. Whether you’re a Tesla owner or planning to become one, understanding the different Tesla Wall Charger versions is crucial to ensure you get the right one for your needs.
1. Tesla Gen 2 Wall Connector
The Tesla Gen 2 Wall Connector is a popular choice among Tesla owners and comes with several notable features:
- Charging Speed: This version provides a maximum charging rate of up to 48 amps, which can deliver approximately 44 miles of range per hour to your Tesla.
- Built-in Cable Management: The Gen 2 Wall Connector features a cable organizer to keep your charging cable neat and easily accessible.
- Wi-Fi Connectivity: It offers Wi-Fi connectivity, allowing you to monitor and control your charging sessions via the Tesla mobile app.
- Compatibility: While designed with Tesla vehicles in mind, it can be adapted for use with other electric vehicles using appropriate adapters.
2. Tesla Wall Connector with Plug
The Tesla Wall Connector with Plug is a versatile option that offers some unique advantages:
- Plug-and-Play Installation: This version comes with a NEMA 14-50 plug, making it simple to install without the need for a dedicated hardwired connection. Just plug it into your existing NEMA 14-50 outlet.
- Adjustable Amperage: You can set the charging current to match your electrical infrastructure, ranging from 16 to 48 amps.
- Compatibility: Like the Gen 2 Wall Connector, this version is compatible with Tesla vehicles and can be adapted for use with other EVs.
- Wi-Fi Connectivity: It also offers Wi-Fi connectivity for remote monitoring and control through the Tesla mobile app.
3. Tesla Wall Connector with Hardwired Installation
This Tesla Wall Connector version is designed for a more permanent installation:
- High Amperage Options: You can choose from various amperage options, with the ability to deliver up to 80 amps for faster charging.
- Hardwired Installation: Unlike the Wall Connector with Plug, this version requires professional hardwired installation directly to your electrical panel.
- Wi-Fi Connectivity: It also provides Wi-Fi connectivity for remote management through the Tesla app.
Choosing the Right Tesla Wall Charger Version
The choice between these Tesla Wall Charger versions ultimately depends on your specific requirements. If you prefer a plug-and-play solution and have a NEMA 14-50 outlet available, the Wall Connector with Plug might be the easiest option.
On the other hand, if you require faster charging and are willing to invest in a professional installation, the Wall Connector with Hardwired Installation could be ideal. The Gen 2 Wall Connector is an excellent all-around choice with versatile features.
Investing in a Tesla Wall Charger not only enhances your EV charging experience but also contributes to the convenience and efficiency of owning an electric vehicle. Make an informed decision based on your needs and enjoy the benefits of hassle-free charging with your Tesla.
Troubleshooting
Are technical glitches and hiccups causing frustration and disruptions in your daily life? Whether you’re dealing with computer issues, home appliances acting up, or any other technical problem, this comprehensive troubleshooting guide will empower you with the knowledge and strategies to tackle common problems head-on and with confidence.
What Is Troubleshooting?
Troubleshooting is the process of identifying, diagnosing, and resolving problems or issues in various systems, devices, or equipment. It’s a critical skill in today’s tech-driven world, helping you save time and money by avoiding unnecessary repairs or replacements.
Key Steps to Effective Troubleshooting:
1. Identify the Problem:
Start by clearly defining the issue you’re experiencing. Is it a slow computer, a malfunctioning appliance, or a network connectivity problem? Accurate problem identification is the first step towards resolution.
2. Gather Information:
Collect relevant information about the problem. Note error messages, unusual behaviors, or recent changes that might be related. This data will be invaluable when seeking a solution.
3. Consult Online Resources:
The internet is a treasure trove of troubleshooting resources. Use search engines, forums, and tech websites to find solutions or guides related to your specific problem.
4. Check Manufacturer Documentation:
Manufacturer manuals, FAQs, and support websites often provide valuable insights into common issues and their solutions. Don’t forget to consult these resources.
5. Perform System Checks:
Conduct basic system checks to rule out hardware issues. For example, check cables and connections, test hardware components, or update drivers and software.
6. Isolate the Cause:
If you have multiple components or devices involved, isolate the cause by testing them individually. This can help pinpoint the source of the problem more accurately.
7. Try Common Fixes:
There are often standard troubleshooting steps for common issues. For instance, restarting a device, clearing a cache, or updating software can resolve many problems.
8. Seek Expert Help:
If the issue persists or is beyond your expertise, don’t hesitate to seek help from professionals or online communities. Sometimes, a fresh pair of eyes can quickly identify the solution.
FAQs about how to Install Tesla wall charger?
Can I install a Tesla wall charger myself?
Tesla offers a DIY Wall Connector installation process, featuring an open wire box with integrated terminals and entry points from top, bottom, and rear. The installation manual and a step-by-step video tutorial are available for easy access.
How much does it cost to install a Tesla wall charger?
The cost of installing a Tesla wall charger and Tesla Wall Connector varies based on job complexity and the electrician’s labor rate, with many getting one for under $1,500.
Can you plug a Tesla into a 220 outlet?
Yes, you can charge a Tesla vehicle using a 220V outlet. Skystream Energy reports that charging a Tesla with a 220V outlet takes 8-10 hours, depending on battery size and charging level. Tesla recommends NEMA 14-50 outlets, but other options work.
What size breaker do I need for a Tesla charger?
The size of a breaker for a Tesla charger depends on the charger type and home electrical capacity. For NEMA 14-50 outlets, a 50-amp breaker is required, while a 60-amp breaker is recommended for Tesla Wall Connectors. Installation is complex and requires a licensed electrician, with costs ranging from $1,000 to $2,000 for standard installations and $700 to $2,600 for Tesla Wall Connectors.
Can I use a dryer outlet to charge Tesla?
Yes, you can use a dryer outlet to charge your Tesla. To charge your Tesla Model Y Standard Range (2021) overnight, you need a special adapter or charger. The outlet should be 10-30 or 14-30, and the charging speed depends on the power of the outlet. The Model Y takes 4 hours and 52 minutes using a 40 Amp charger.
Does the Tesla wall charger need its own breaker?
Yes, the Tesla Wall Connector requires its own breaker. Tesla’s installation manual recommends a 60 amp breaker size for the Wall Connector. The process requires a licensed electrician and can be complex. Costs vary based on location, electrical system condition, and complexity. Standard installation costs range from $1,000 to $2,000, with some getting it for under $1,500.
Conclusion
In conclusion, mastering how to install a Tesla Wall Charger is not only about enhancing your electric vehicle’s charging convenience but also about embracing the future of sustainable transportation. By following the step-by-step guide for installing a Tesla Wall Charger, you’ll have your home charger set up efficiently and safely.
Whether you choose to install it yourself or hire an electrician for the job, the benefits of owning a Tesla Wall Connector are undeniable. With the ability to charge your Tesla at home, you’re not just driving an electric car; you’re driving a sustainable future.
So, don’t hesitate – take charge, install your Tesla Wall Charger, and contribute to a greener world with every electric mile you drive.